OpenAPI Microsoft | Register Application
Registering your application establishes a trust relationship between your app and the Microsoft identity platform. The trust is unidirectional: your app trusts the Microsoft identity platform, and not the other way around.
Follow these steps to create the app registration:
-
Sign in to the Azure Portal.
-
If you have access to multiple tenants, use the Directories + subscriptions filter in the top menu to switch to the tenant in which you want to register the application.
-
Search for and select Azure Active Directory.
-
Under Manage, select App registrations > New registration.
-
Enter a display Name for your application. Users of your application might see the display name when they use the app, for example during sign-in. You can change the display name at any time and multiple app registrations can share the same name. The app registration's automatically generated Application (client) ID, not its display name, uniquely identifies your app within the identity platform.
-
Specify who can use the application, sometimes called its sign-in audience.
-
Select Register to complete the initial app registration

Add a redirect URI
A redirect URI is the location where the Microsoft identity platform redirects a user's client and sends security tokens after authentication.
In a production web application, for example, the redirect URI is often a public endpoint where your app is running, like https://contoso.com/auth-response. During development, it's common to also add the endpoint where you run your app locally, like https://127.0.0.1/auth-response or http://localhost/auth-response.
This RedirectURI will be used later to configure the sgcOpenAPI Microsoft Client.
Add credentials
Credentials are used by confidential client applications that access a web API. Examples of confidential clients are web apps, other web APIs, or service-type and daemon-type applications. Credentials allow your application to authenticate as itself, requiring no interaction from a user at runtime.
You can add both certificates and client secrets (a string) as credentials to your confidential client app registration.
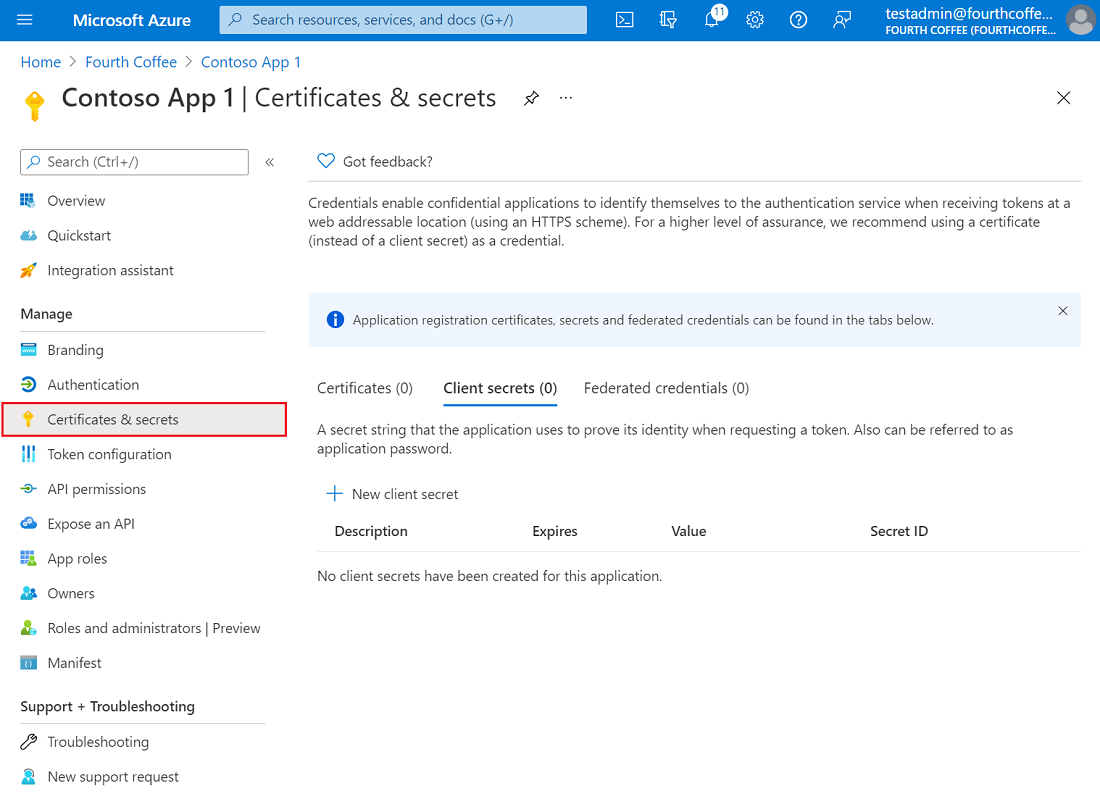
Add a client secret
Sometimes called an application password, a client secret is a string value your app can use in place of a certificate to identify itself.
Client secrets are considered less secure than certificate credentials. Application developers sometimes use client secrets during local app development because of their ease of use. However, you should use certificate credentials for any of your applications that are running in production.
- In the Azure portal, in App registrations, select your application.
- Select Certificates & secrets > Client secrets > New client secret.
- Add a description for your client secret.
- Select an expiration for the secret or specify a custom lifetime.
- Client secret lifetime is limited to two years (24 months) or less. You can't specify a custom lifetime longer than 24 months.
- Microsoft recommends that you set an expiration value of less than 12 months.
- Select Add.
- Record the secret's value for use in your client application code. This secret value is never displayed again after you leave this page.